一、在前端插件项目写一个弹窗插件(必须知道插件如何开发)

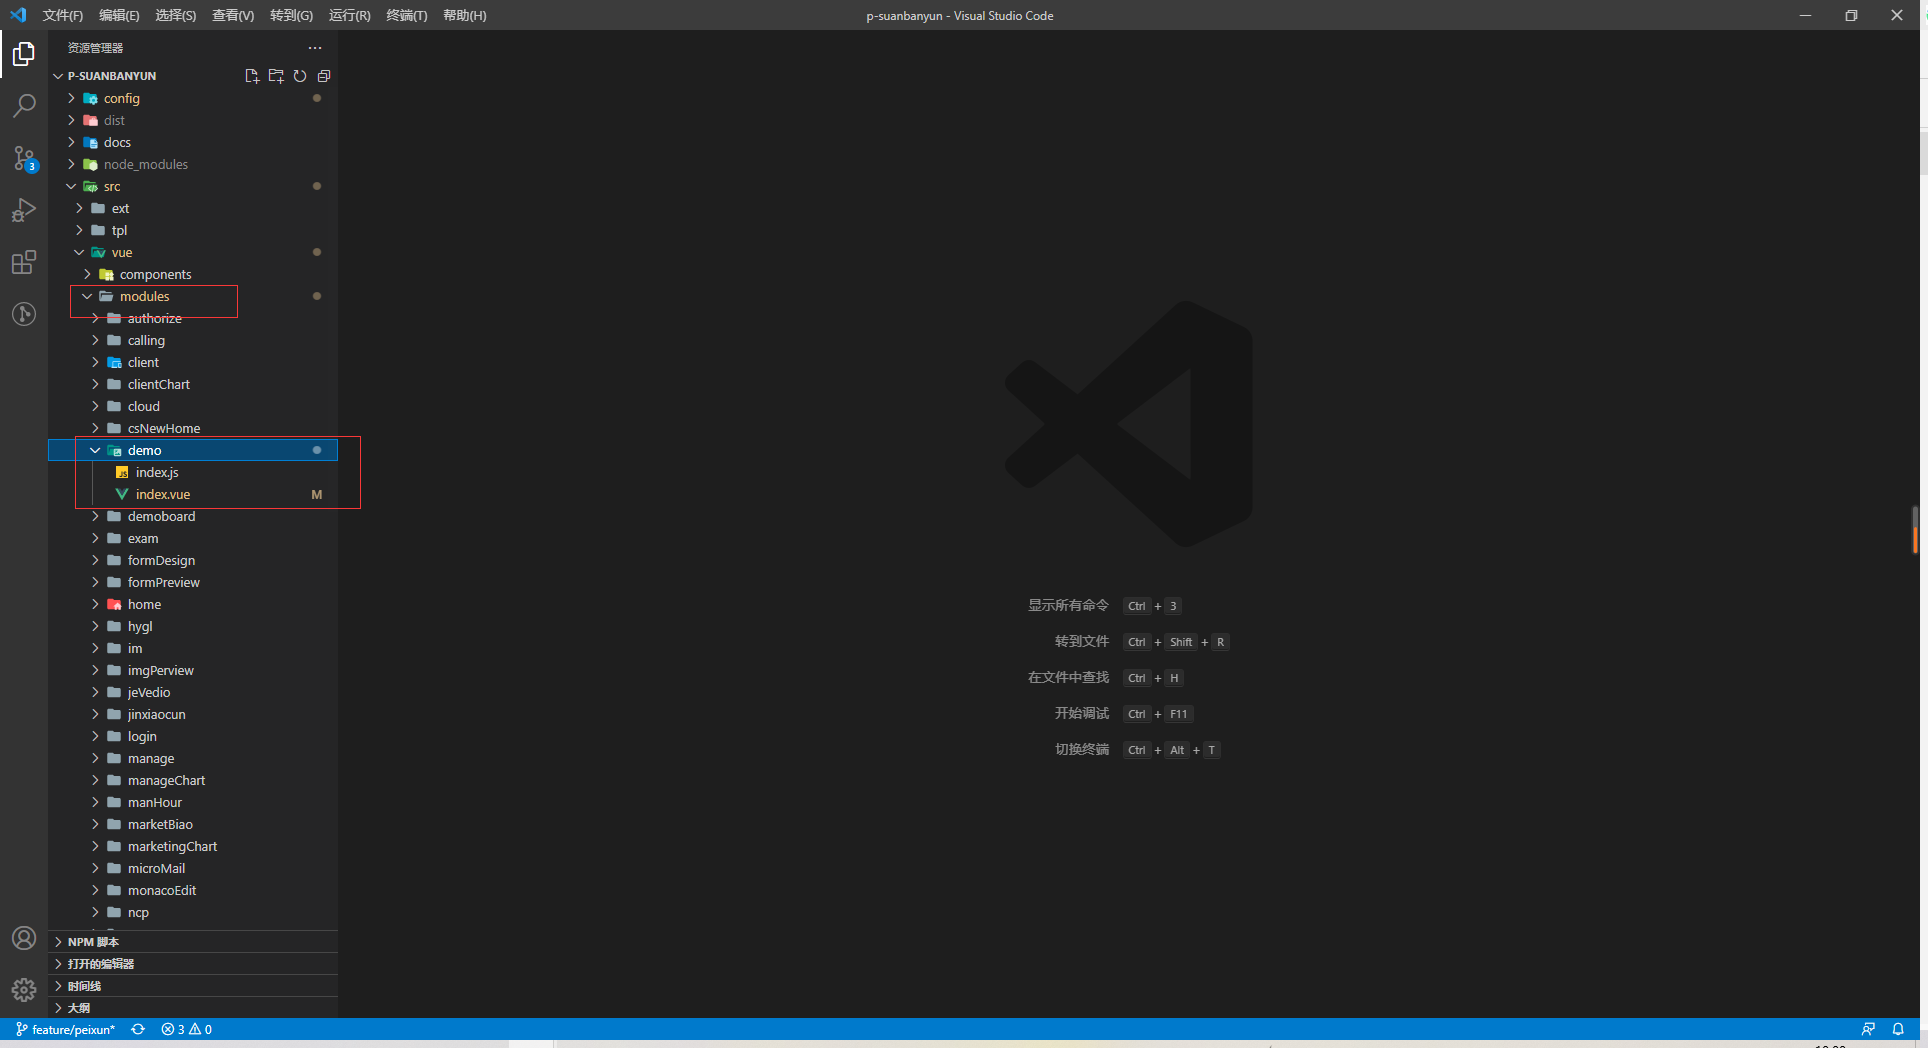
1. src/vue/modules/demo/index.js

import { install } from '../../install.js';
import index from './index.vue';
// 安装组件
install('Demo', index);
2. src/vue/modules/demo/index.vue

<template>
  <div
    v-show="showMask"
    class="dialog"
  >
    <div class="dialog-container">
      <div class="dialog-title">
        {{ title }}
      </div>
      <div
        v-html="content"
        class="content"
      />
      <div class="btns">
        <div
          v-if="type != 'confirm'"
          @click="closeBtn"
          class="default-btn"
        >
          {{ cancelText }}
        </div>
        <div
          v-if="type == 'danger'"
          @click="dangerBtn"
          class="danger-btn"
        >
          {{ dangerText }}
        </div>
        <div
          v-if="type == 'confirm'"
          @click="confirmBtn"
          class="confirm-btn"
        >
          {{ confirmText }}
        </div>
      </div>
      <div
        @click="closeMask"
        class="close-btn"
      >
        <i class="iconfont icon-close" />
      </div>
    </div>
  </div>
</template>


<script>
// import ChartBar from './components/chart-bar';

export default {
  name: 'Demo',
  components: {
  },
  props: {
    value: {},
    // 类型包括 defalut 默认, danger 危险, confirm 确认,
    type: {
      type: String,
      default: 'default',
    },
    content: {
      type: String,
      default: '内容',
    },
    title: {
      type: String,
      default: '这是标题',
    },
    cancelText: {
      type: String,
      default: '取消',
    },
    dangerText: {
      type: String,
      default: '删除',
    },
    confirmText: {
      type: String,
      default: '确认',
    },
  },
  data() {
    return {
      showMask: true,
    };
  },
  watch: {
    value(newVal, oldVal) {
      this.showMask = newVal;
    },
    showMask(val) {
      this.$emit('input', val);
    },
  },
  mounted() {
    this.showMask = true;
  },
  methods: {
    closeMask() {
      this.showMask = false;
    },
    closeBtn() {
      this.$emit('cancel');
      this.closeMask();
    },
    dangerBtn() {
      this.$emit('danger');
      this.closeMask();
    },
    confirmBtn() {
      this.$emit('confirm');
      this.closeMask();
    },
  },

};
</script>

<style lang="less" scoped>
    .dialog{
        position: fixed;
        top: 0;
        bottom: 0;
        left: 0;
        right: 0;
        background: rgba(0, 0, 0, 0.6);
        z-index: 9999;
        .dialog-container{
            width: 500px;
            height: 380px;
            background: #ffffff;
            position: absolute;
            top: 50%;
            left: 50%;
            transform: translate(-50%, -50%);
            border-radius: 8px;
            position: relative;
            .dialog-title{
                width: 100%;
                height: 60px;
                font-size: 18px;
                color: #696969;
                font-weight: 600;
                padding: 16px 50px 0 20px;
                box-sizing: border-box;
            }
            .content{
                color: #797979;
                line-height: 26px;
                padding: 0 20px;
                box-sizing: border-box;
            }
            .inp{
                margin: 10px 0 0 20px;
                width: 200px;
                height: 40px;
                padding-left: 4px;
                border-radius: 4px;
                border: none;
                background: #efefef;
                outline: none;
                &:focus{
                    border: 1px solid #509EE3;
                }
            }
            .btns{
                width: 100%;
                height: 60px;
                // line-height: 60px;
                position: absolute;
                bottom: 0;
                left: 0;
                text-align: right;
                padding: 0 16px;
                box-sizing: border-box;
                & > div{
                    display: inline-block;
                    height: 40px;
                    line-height: 40px;
                    padding: 0 14px;
                    color: #ffffff;
                    background: #f1f1f1;
                    border-radius: 8px;
                    margin-right: 12px;
                    cursor: pointer;
                }
                .default-btn{
                    color: #787878;
                    &:hover{
                        color: #509EE3;
                    }
                }
                .danger-btn{
                    background: #EF8C8C;
                    &:hover{
                        background: rgb(224, 135, 135);
                    }
                    &:active{
                        background: #EF8C8C;
                    }
                }
                .confirm-btn{
                    color: #ffffff;
                    background: #509EE3;
                    &:hover{
                        background: #6FB0EB;
                    }
                }
            }
            .close-btn{
                position: absolute;
                top: 16px;
                right: 16px;
                width: 30px;
                height: 30px;
                line-height: 30px;
                text-align: center;
                font-size: 18px;
                cursor: pointer;
                &:hover{
                    font-weight: 600;
                }
            }
        }
    }
</style>
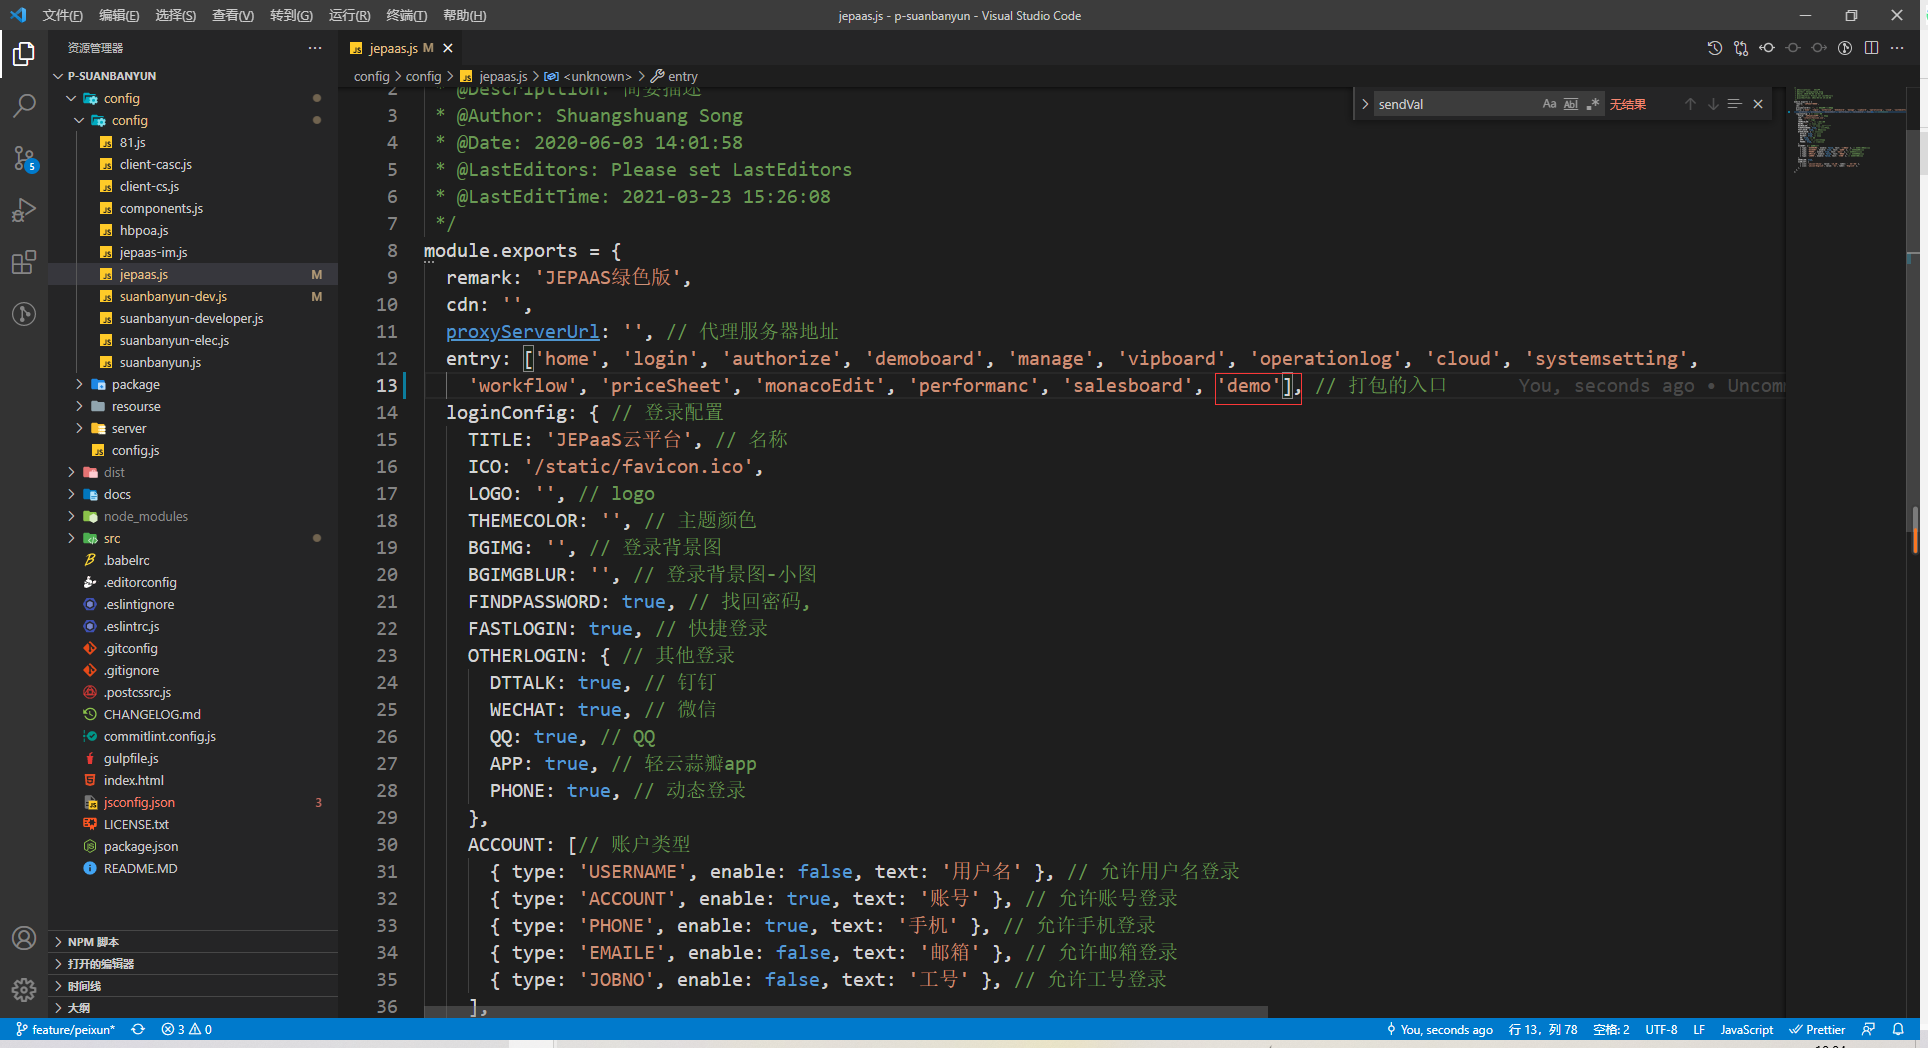
3. 在config/config/jepaas.js文件中加入组件(文件夹名称)

二.在平台挂定义一个全局方法
1.npm run dev 启动插件项目
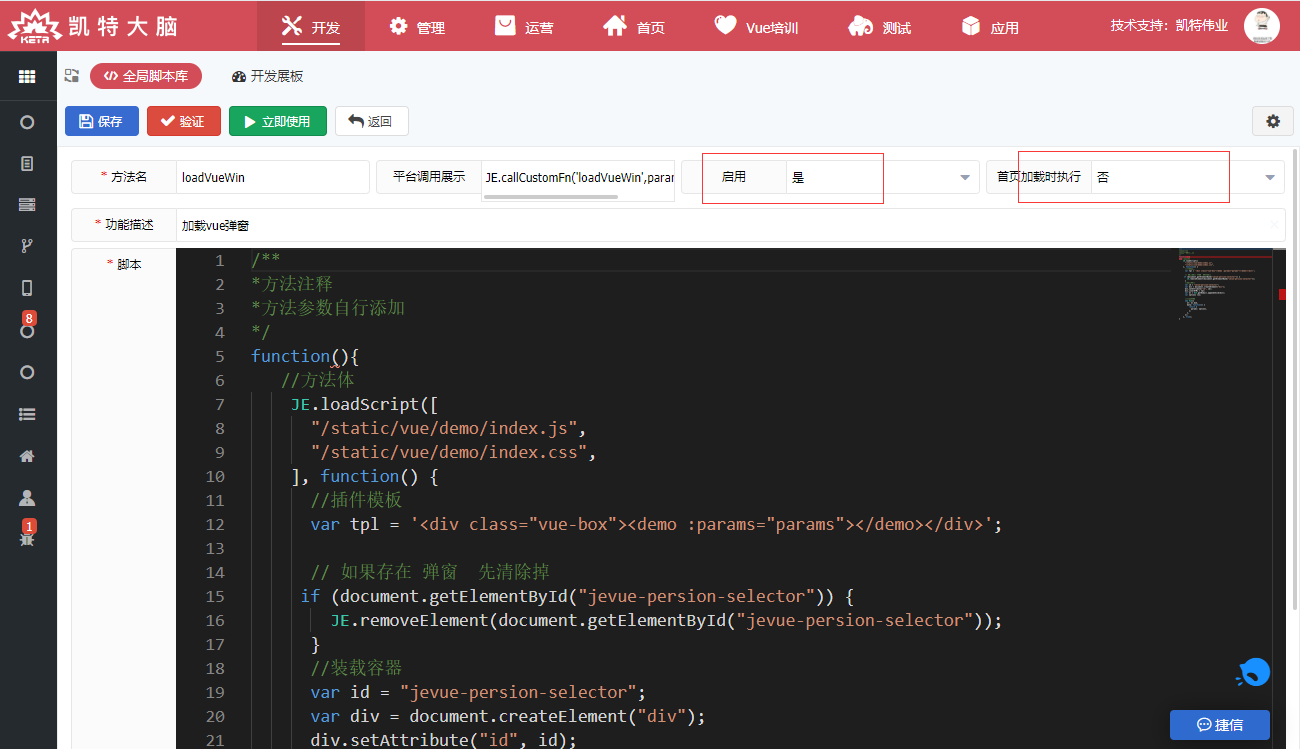
2.开发=》全局脚本库添加数据

JE.loadScript([
      "/static/vue/demo/index.js",
      "/static/vue/demo/index.css",
    ], function() {
      //插件模板
      var tpl = '<div class="vue-box"><demo :params="params"></demo></div>';

      // 如果存在 弹窗  先清除掉
     if (document.getElementById("jevue-persion-selector")) {
        JE.removeElement(document.getElementById("jevue-persion-selector"));
      }
      //装载容器
      var id = "jevue-persion-selector";
      var div = document.createElement("div");
      div.setAttribute("id", id);
      div.innerHTML = tpl;
      var el = Ext.getBody().appendChild(div);
      var options ={};

      //载入页面
      new Vue({
        el: el.dom,
        data: function() {
          return {
            params: options,
          };
        },
      });
    }, true);
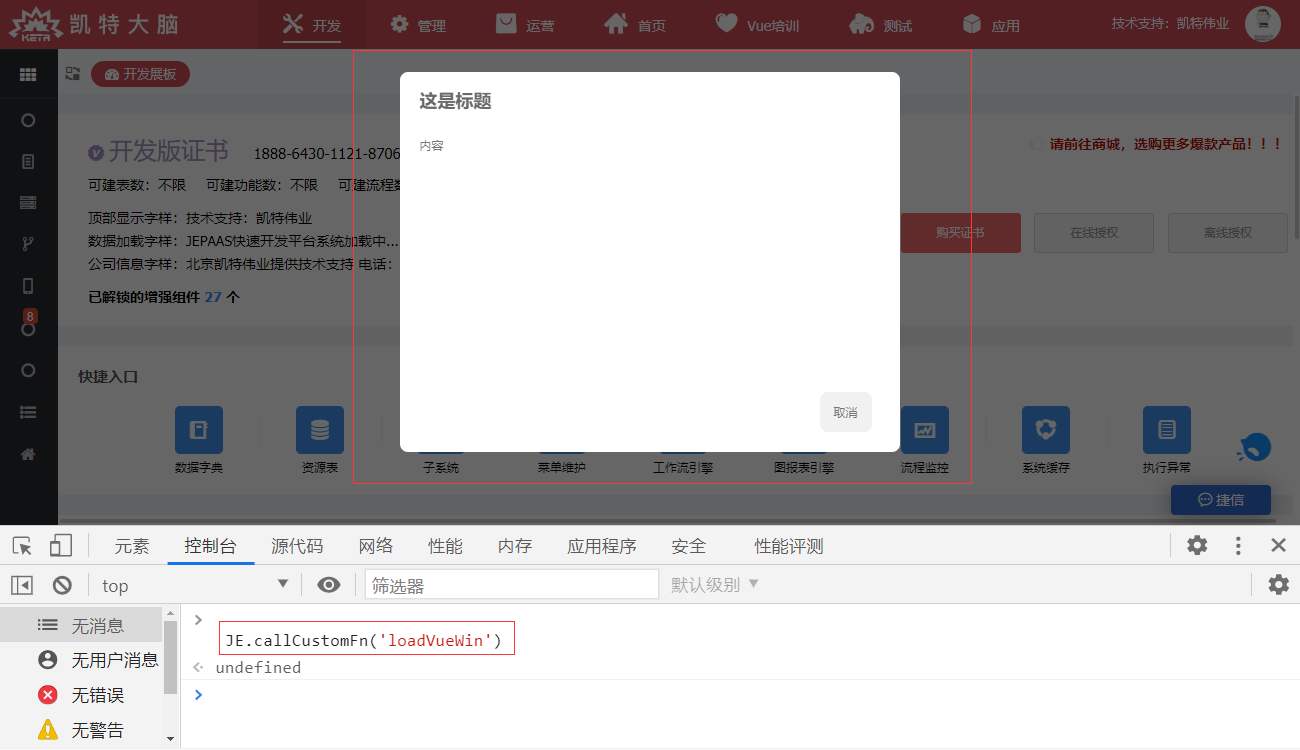
三、调用该方法
JE.callCustomFn('loadVueWin')
最后编辑: 庞峰 文档更新时间: 2025-05-23 14:31 作者:庞峰
