案例描述
添加自定义缓存
实现思路
添加自定义缓存
将缓存加入到配置文件
使用自定义缓存
操作步骤
1. 创建自定义缓存MyConfigCacheManager
package com.je.cache.service.funcInfo;

import com.je.cache.service.EhcacheManager;

import java.util.Map;

/**
 * 我的缓存
 */
public class MyConfigCacheManager {

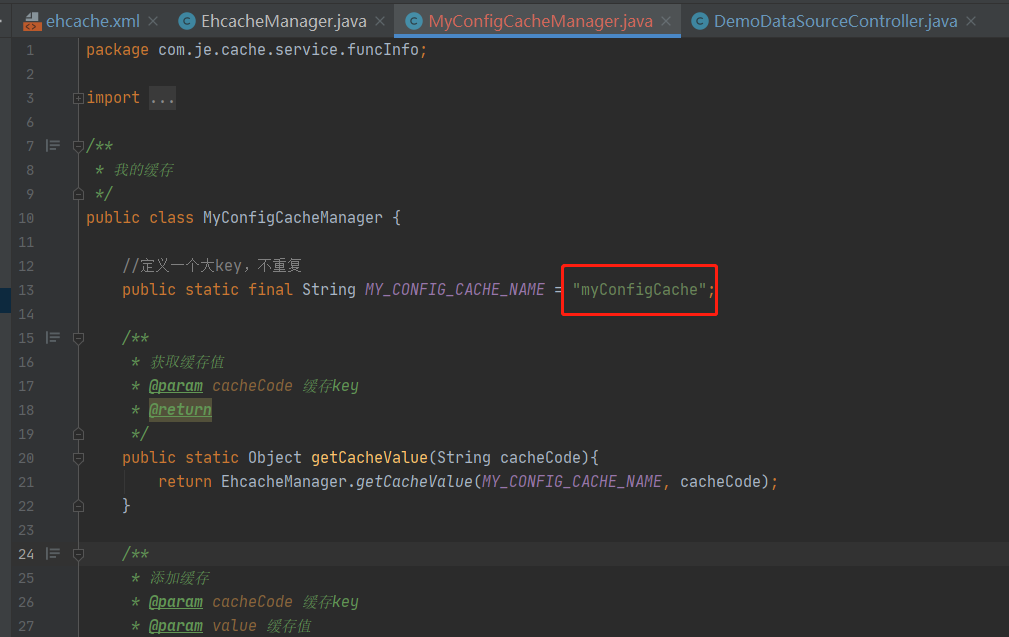
    //定义一个大key,不重复
    public static final String MY_CONFIG_CACHE_NAME = "myConfigCache";

    /**
     * 获取缓存值
     * @param cacheCode 缓存key
     * @return
     */
    public static Object getCacheValue(String cacheCode){
        return EhcacheManager.getCacheValue(MY_CONFIG_CACHE_NAME, cacheCode);
    }

    /**
     * 添加缓存
     * @param cacheCode 缓存key
     * @param value 缓存值
     */
    public static void putCache(String cacheCode,Object value){
        EhcacheManager.putCache(MY_CONFIG_CACHE_NAME, cacheCode, value);
    }

    /**
     * 清空所有缓存
     */
    public static void clearAllCache(){
        EhcacheManager.clearAllCache(MY_CONFIG_CACHE_NAME);
    }

    /**
     * 清空指定的缓存
     * @param cacheCode 缓存key
     */
    public static void removeCache(String cacheCode){
        EhcacheManager.removeCache(MY_CONFIG_CACHE_NAME, cacheCode);
    }

}
2. 将缓存加入到配置文件
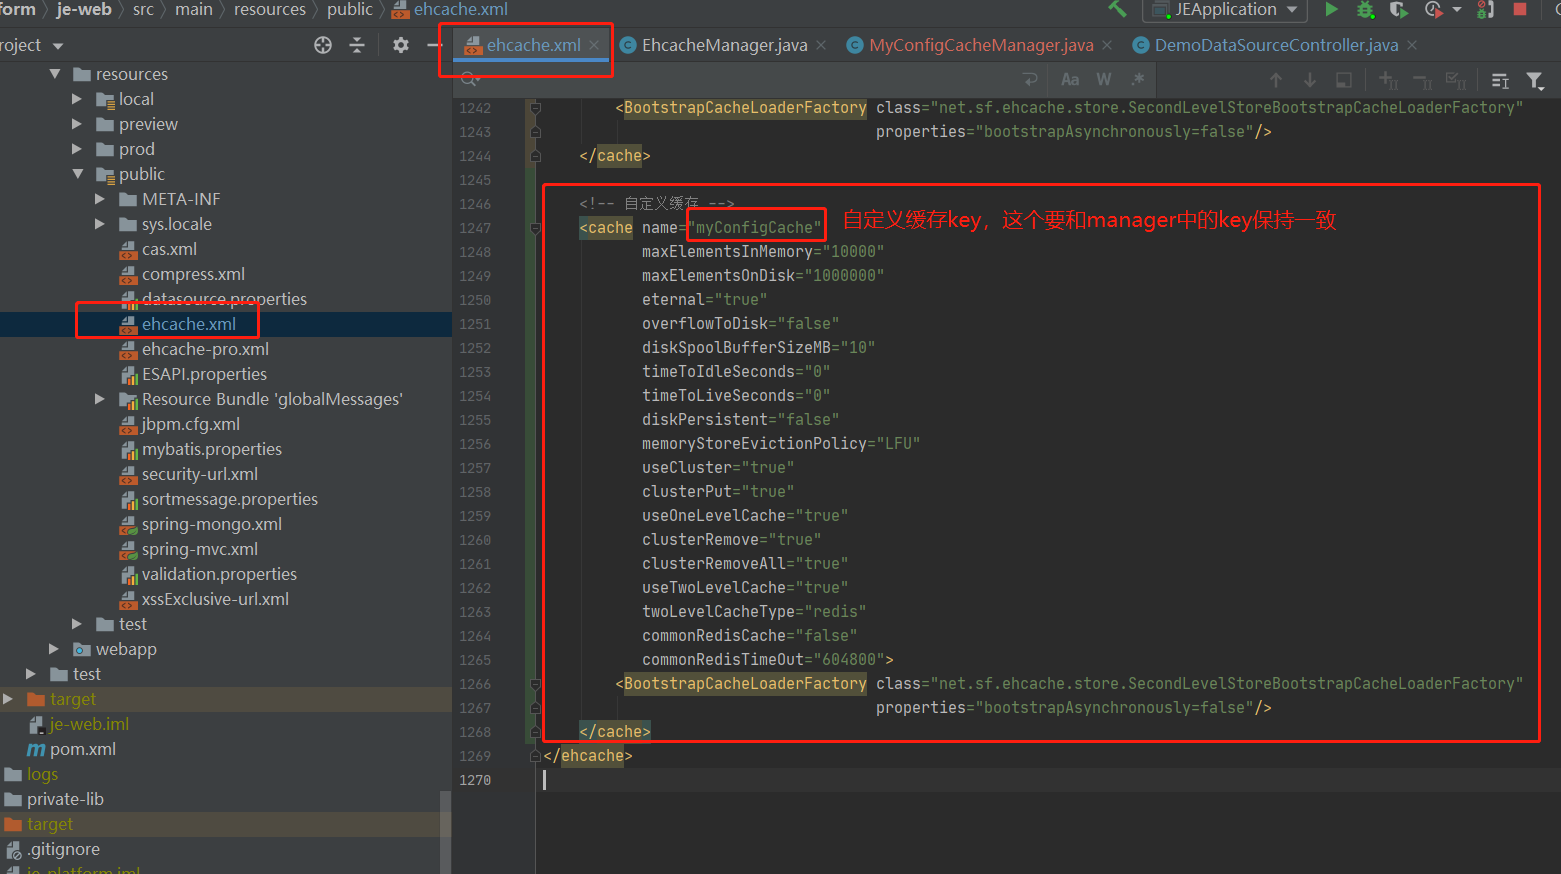
打开public文件夹ehcache.xml,添加自定义缓存
<!-- 自定义缓存 -->
    <cache name="myConfigCache"
           maxElementsInMemory="10000"
           maxElementsOnDisk="1000000"
           eternal="true"
           overflowToDisk="false"
           diskSpoolBufferSizeMB="10"
           timeToIdleSeconds="0"
           timeToLiveSeconds="0"
           diskPersistent="false"
           memoryStoreEvictionPolicy="LFU"
           useCluster="true"
           clusterPut="true"
           useOneLevelCache="true"
           clusterRemove="true"
           clusterRemoveAll="true"
           useTwoLevelCache="true"
           twoLevelCacheType="redis"
           commonRedisCache="false"
           commonRedisTimeOut="604800">
        <BootstrapCacheLoaderFactory class="net.sf.ehcache.store.SecondLevelStoreBootstrapCacheLoaderFactory"
                                     properties="bootstrapAsynchronously=false"/>
    </cache>

3. 使用自定义缓存
package com.project.demo.controller;

import com.je.cache.service.funcInfo.MyConfigCacheManager;
import com.je.core.base.MethodArgument;
import com.je.core.controller.PlatformController;
import com.je.core.result.BaseRespResult;
import com.je.core.service.MetaService;
import org.springframework.beans.factory.annotation.Autowired;
import org.springframework.stereotype.Controller;
import org.springframework.web.bind.annotation.RequestMapping;
import org.springframework.web.bind.annotation.RequestMethod;
import org.springframework.web.bind.annotation.ResponseBody;

@Controller
@RequestMapping(value = "/je/demo/chache")
public class DemoDataSourceController extends PlatformController {

    @Autowired
    private MetaService metaService;

    private static final String CACHE_KEY = "test";

    @RequestMapping(value = {"/test"}, method = {RequestMethod.GET}, produces = {"application/json; charset=utf-8"})
    @ResponseBody
    public BaseRespResult doSave(MethodArgument param) {
        //添加缓存
        MyConfigCacheManager.putCache(CACHE_KEY, "1111111");
        //获取缓存
        System.out.println(MyConfigCacheManager.getCacheValue(CACHE_KEY));
        //清空指定缓存
        MyConfigCacheManager.removeCache(CACHE_KEY);
        //清空该缓存下的所有缓存值
        MyConfigCacheManager.clearAllCache();
        return null;
    }

}
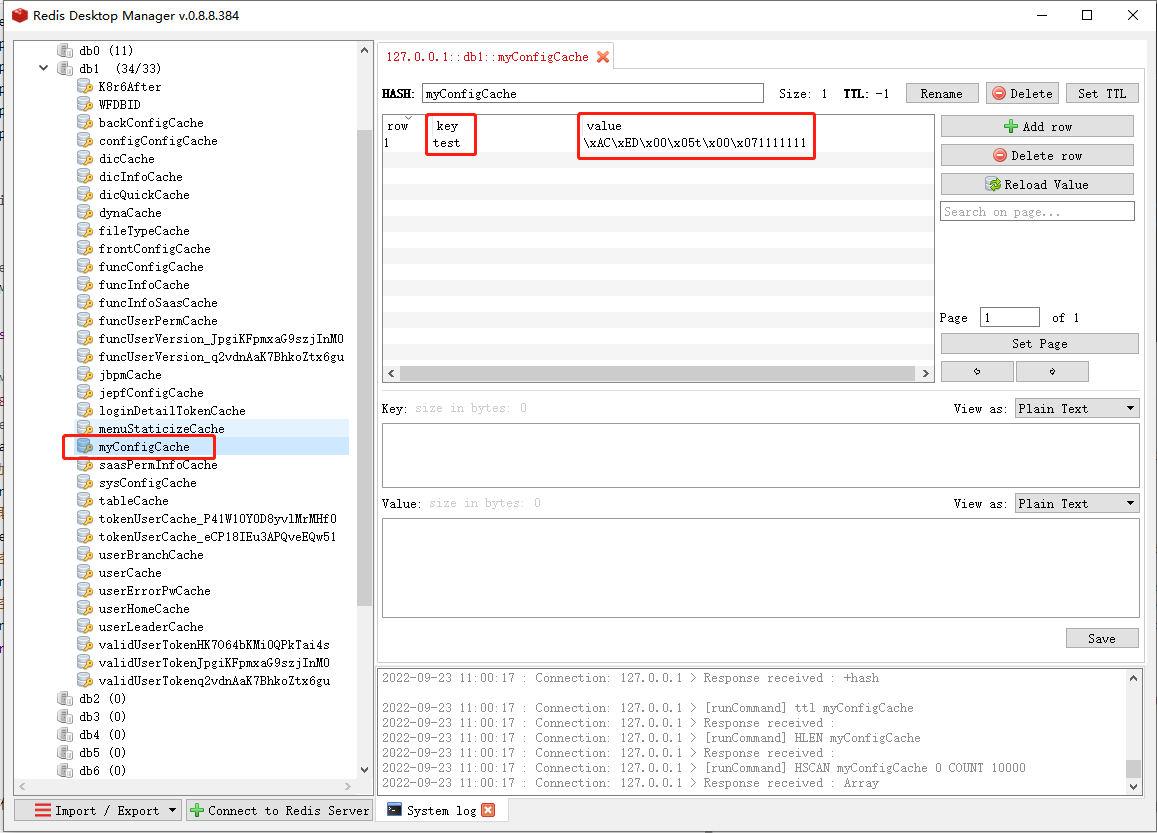
对应redis中存储效果
最后编辑: 于春辉 文档更新时间: 2025-05-23 14:31 作者:于春辉
